Intermediate Tutorial: Pong, Creating a Multiplayer AR Game
An example Unity project in which ARDK’s features are used to create an AR Multiplayer version of Pong.
This tutorial will cover all of the Unity steps as well as C# script implementations in order to make the project work. Please note that this implementation uses low level messages to send data between players. Another version of this project will demonstrate the setup and use of High Level API objects (HLAPI) to streamline the message sending and receiving process for synchronizing players (here).
Getting Started
Provided Helpers
A few helpers and prefabs are used in this scene, to quickly provide boilerplate behaviour.
Using ARNetworkingSceneManager
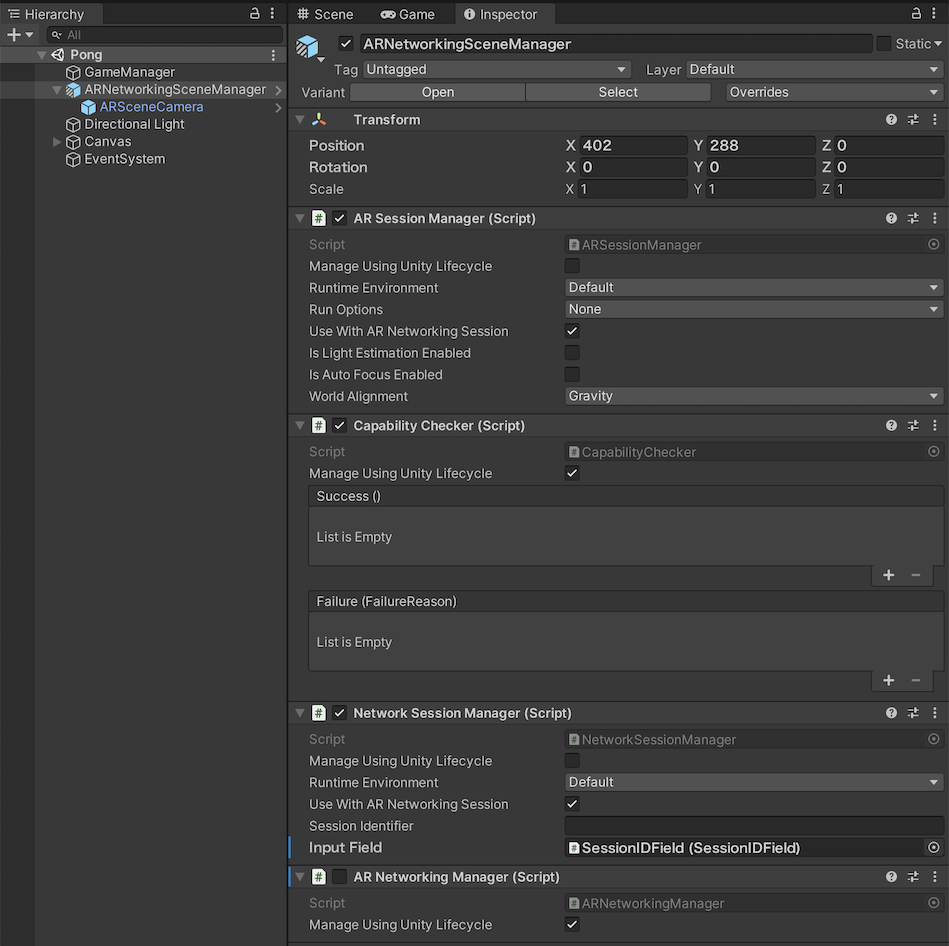
The ARNetworkingSceneManager is a prefab that provides tooling to generate an ARSession and ARWorldTrackingConfiguration, as well as set up the Unity Scene camera to render the ARSession ‘s camera texture. In this scene the option to Manage Using Unity Lifecycle is enabled for ARNetworkingManager but the component itself is disabled. Whenever the component is enabled it will create the ARNetworking object, along with its supporting ARSession and MultipeerNetworking objects, and join the networking session.
Manage Using Unity Lifecycle is disabled for both the ARSessionManager and NetworkSessionManager because the ARNetworkingManager lifecycle will control them.

Using NetworkStatusIndicator
The NetworkStatusIndicator prefab provides a simple image to visualize the current network state of an MultipeerNetworking object. The circle icon will update in color to represent the current state (white = Uninitialized, yellow = Initialized, magenta = Connected as host, blue = Connected as peer, red = Error).
Using SessionIDField
The SessionIDField prefab wraps a basic Unity InputField to provide an API to programatically get a SessionID, as well as store the last used SessionID. Furthermore, the MultipeerTextFieldSessionIDProvider will append the current Unity scene’s name to the provided SessionID to ensure that different scenes (with potentially different networking requirements and protocols) will not join the same session accidentally.
Using FeaturePreloadManager
The FeaturePreloadManager (found on the GameManagers GameObject) will automatically start downloading required resources upon scene load. If this component was not present, the resources would be automatically downloaded when the first ARSession that requires them runs; hence, preloading is useful because it decreases the initialization time of the initial run. Subsequent runs are unaffected, as they will find the resources in the cache.
Game Managers
A container GameObject for keeping game-related components in one place. The GameController is a new script that manages the gameplay logic of the Pong game.
Creating Prefabs
There are several prefabs, located in ARDKExamples/Pong/Prefabs, created for this example: the playing field, ball, and player avatar. The GameController script has references to these prefabs in order to instantiate them as required at runtime.
Trigger Colliders
The prefabs have mostly basic components, such as mesh renders, colliders, and materials. The most notable components added or configured in order to support game logic are:
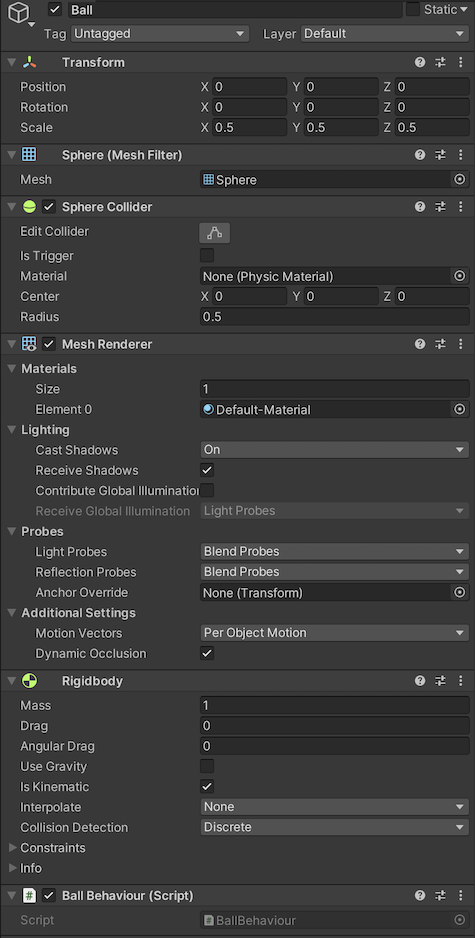
The Ball prefab has a
RigidBodycomponent to support trigger colliders, as well as aBallBehaviourcomponent (described later)

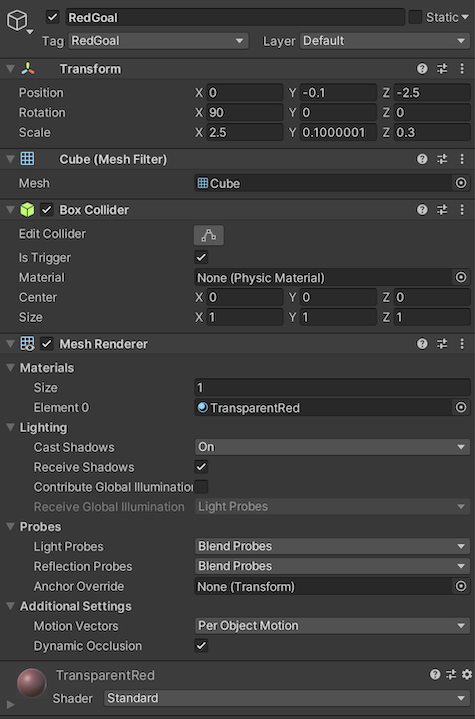
The Goals objects of the TableTop prefab have
BoxCollidercomponents withIsTriggerenabled.

This combination causes the Unity event OnTriggerEntered(Collider other) to be invoked in the BallBehaviour script whenever the ball comes in contact with a goal. The Goals have tags (“RedGoal” and “BlueGoal”) which can be queried from the event’s collider argument and used to determine which goal was scored.
private void OnTriggerEnter(Collider other)
{
  // Some removed game logic here...

  switch (other.gameObject.tag)
  {
    case "RedGoal":
      Controller.GoalScored("red");
      break;

    case "BlueGoal":
      Controller.GoalScored("blue");
      break;
  }
}
Note that the player avatar (paddle) is not a trigger collider. Collisions with the player are computed programmatically, though a similar trigger system would work just as well.
Creating the UI
The next step would be to create a UI for inputting a session code, as well as some tools to determine the current connectivity state and game options. A canvas was added to the game scene, onto which was added a button to start the session, an input field to get the session ID, a white circle to represent the connectivity state, a text field for the score, and a button to start the game.

References to all UI elements were passed into scripts to programmatically enable/disable elements at times, as well as change the score text and colour of the connected indicator.
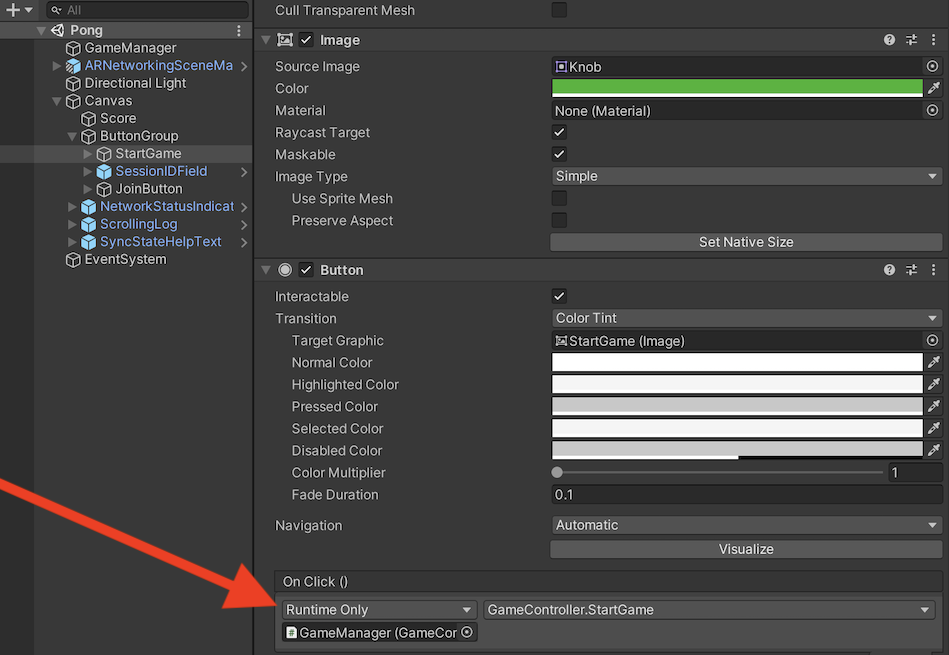
The Join button is set to enable the ARNetworkingManager component on click, while StartGame is set to trigger GameController.StartGame().
